

This tutorial is by Naise M and has been translated with your permission
SCRIPT:
(click on the prints for a better view)
01. Open a new transparent image with 950x600px
01.1 place the color #ffffff in the foreground and the color # ab4e63 in the background
02. prepare a linear gradient and paint the image


03. effects / plugins / unlimited 2 / simple / pizza slice mirror


04. layers / duplicate
05. image / mirror / mirror horizontal
06. layers / properties / blend mode: exclusion


07. merge visible
08. effects / plugins / unlimited 2 / bkg designer sf10 I / cruncher


09. effects / edge effects / enhance more
10. open the tube (deco-1) on psp / activate the layer raster 2
11. effects / plugins / nik software / color efex pro 3.0 / bi-color filters (optional) / violet / pink 2


12. copy and paste as a new layer in your work
13. activate the pen tool and configure according to the print. (The preset (small dash) is in the material)


14. add a new layer
15. draw a line according to the print, using the Linear gradient
(Note: for the line to come out perfectly, click shift along with the mouse button)


15.1 layers / convert to raster layer
16. layers / duplicate
17. image / mirror / mirror vertical (flip)
18. open the tube (deco-2) on psp
19. colorize as you wish
(Note: use: Hue and saturation / colorize or the Change Color tool)
20. copy and paste as new layer
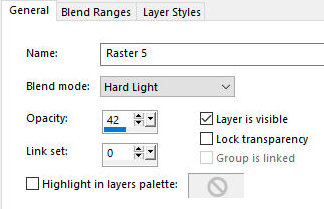
21. layers / properties / blend mode: hard light

22. image / add borders / 64px / color #ffffff
23. effects / plugins / aaa frames / foto frame


24. select the white part of the outside edge with the magic wand


25. effects / plugins / aaa frames / texture frame


26. select none
27. select the white part inside the border with the magic wand
28. selections / promote selection to layer
29. effects / plugins / unlimited 2 / bkg designer sf10 I / cruncher


30. effects / user defined filter / edge-enhance-more (the preset is in the material)


31. drop shadow: 1 1 93 4.35 black
32. image / add borders / 6px / color # ab4e63
33. add new layer
34. activate the Paint Brush tool / locate the brush (KJC_CuteLilWorm 001) /
configure according to the print / stamp in the location indicated with the gradient
(Note: brush on the material. Export as a brush)


35. drop shadow: 1 0 74 5.80 black
35.1 layers / Duplicate / Image / Mirror / Image / flip
36. copy your main tube and paste it as a new layer
37. Make adjustments: size, drop shadow, etc.
38. position as desired
39. copy the tube (name) and paste it as a new layer
40. position according to model or as desired
41. copy your flower tube and paste it as a new layer
42. Make the necessary adjustments (size, drop shadow)
43. position as desired or as the model
44. layers / properties / blend mode: overlay (or according to your colors)


45. image / resize: width 1000px
46. place your signature
47. merge all
48. save: file / export / jpeg optimizer
Thank you for doing my translations
Thank you for doing my translations
Nenhum comentário:
Postar um comentário
Observação: somente um membro deste blog pode postar um comentário.