


Este tutorial é de Cloclo e foi traduzido com a sua permissão
Tutorial: Linda - Original AQUI
Créditos:Yuki
Versão: Catetoile
Material - AQUI
Plugins:
Unlimited 2 / distort / ZigZag
Eye Candy 5: Impact / Glass
Toadies / What are you?
Unlimited 2 / Texturize / Wood 2
Unlimited 2 / &<Sandflower Special °v°>
Graphic Plus / Cross shadow
Textures / Placage de Texture
AAA Frame / Foto Frame
Plugins - AQUI
|
ROTEIRO:

(Clique nos prints para visualizar melhor)
01. Coloque a cor #bfccf4 no foreground e a cor #016199 no background

02. Abra o arquivo alpha (canal_alpha_Linda) / Duplique (Shift+D) / Feche o original / Renomeie para Raster 1
03. Pinte com a cor do background
04. Adicione nova layer
05. Pinte com a cor do foreground
06. Layers / New Mask Layer / From Image / Mask (Jillmask_claire)


07. Adjust / Sharpness / Sharpen
08. Merge Group
09. Merge down
10. Adicione nova layer
11. Selections / Load selection from alpha channel / Selection (Cloclo)


12. Pinte a seleção com este gradiente Linear:

13. Effects / Plugins / Unlimited 2 / Distort / Radial ZigZag

14. Effects / Plugins / Eye Candy 5: Impact / Glass
Preset (Glass-Linda)


15. Select None
16. Layers / Duplicate
17. Image / Mirror / Mirror Horizontal
18. Ative a layer abaixo
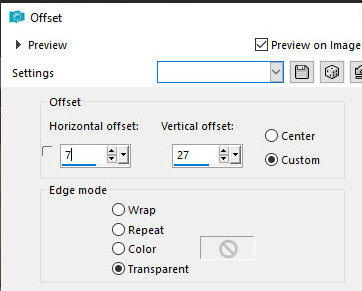
19. Effects / Image Effects / Offset (0/27)


20. Ative a layer acima
21. Effects / Image Effects / Offset (7/27)

22. Merge down
Adicione nova layer
23. Selections / Load selection from alpha channel / Selection (Cloclo1)


24. Pinte com o gradiente anterior
25. Select None
26. Effects / Plugins / Toadies / what are you?

27. Effects / Edge Effects / Enhance
28. Drop Shadow: 1 1 45 0 cor do background
29. Ative a layer inferior Raster 1
30. Selections / Load selection from alpha channel / Selection (Cloclo2)


31. Selections / promote selection to layer
32. Layers / Arrange / Bring to top
33. Effects / Plugins / Unlimited 2 / Texturize / Wood 2

34. Selections / Modify / Select selection borders

35. Effects / 3D Effects / Innver Bevel

36. Select None
37. Ative a layer inferior - Raster 1
38. Selections / Load selection from alpha channel / Selection (Cloclo3)


39. Selections / Promote selection to layer
40. Pinte com o gradiente anterior
41. Effects / Plugins / Eye Candy 5: Impact / Glass
Preset (Glass-Linda)


42. Select None
43. Layers / Duplicate
44. Image / Mirror / Mirror Horizontal
45. Posicione Ligeiramente à direita, veja o modelo
46. Merge down
47. Ative a layer abaixo
48. Selections / Load selection from alpha channel / Selection (Cloclo4)


49. Selections / Promote selection to layer
50. Copie a (image 1) / Cole na seleção
51. Selections / Modify / Select selection borders - igual ao anterior


52. Adicione nova layer
53. Pinte com o gradiente
54. Effects / 3D Effects / Inner Bevel igual ao anterior


55. Select None
56. Merge down
57. Layers / duplicate
58. Image / Resize: 70% - all layers desmarcado
59. Posicione embaixo conforme o modelo
60. Merge down
61. Ative a layer abaixo
62. Selections / Load selection from alpha channel / Selection (Cloclo5)


63. Selections / promote selection to layer
64. Copie (image 2) / Cole na seleção
65. Selections / Modify / Select selection borders igual ao anterior


66. Adicione uma nova layer
67. Pinte com o gradiente
68. Effects /3D Effects / Inner Bevel igual ao anterior


69. Select None
70. Merge down
71. Layers / duplicate
72. Image / Resize: 70% - all layers desmarcado
73. Posicione conforme o modelo
74. Merge Down
75. Ative a layer abaixo
76. Selections / Load selection from alpha channel / Selection (Cloclo6)


77. Selections / Promote selection to layer
78. Pinte com o gradiente
79. Effects / Plugins / Unlimited 2 / &<Sandflower Special °v° > Starmaker

80. Select None
81. Layers / duplicate
82. Image / Mirror / Mirror Horizontal
83. Image / Mirror / Mirror Vertical
84. Merge down
85. Ative a layer superior
86. Selections / Load selection from alpha channel / Selection (Cloclo7)


87. Adicione nova layer
88. Pinte com o gradiente
89. Select None
90. Copie o tube (deco cloclo1) / Cole como nova layer
91. Não precisa mover
92. Merge visible
93. Image / Add borders / 2px / cor do background
Image / Add borders / 15px / branco
Image / Add borders / 2px / cor do background
94. Selections / Select All
95. Image / Add borders / 40px / branco
96. Selections / Invert
97. Pinte com o gradiente
98. Effects / Plugins / Graphic Plus / Cross Shadow / Default


99. Effects / Plugins / Textures / Placage de Texture

100. Effects / Plugins / AAA Frames / Foto Frame

101. Selections / Invert
102. Drop Shadow: 0 0 100 40 preto
103. Select None
104. Image / Add borders / 1px / cor do foreground
Copie o tube (deco Cloclo) / cole como nova layer
Não precisa mover
Copie o seu tube de Mulher / Cole como nova layer
Posicione conforme o modelo
Drop Shadow de sua escolha
Merge All
Coloque sua assinatura
Adjust / Sharpness / Unsharp Mask

Image / Resize: Width 1.100px
Salve: File / Export / Jpeg Optimizer
Obrigada por fazer minhas traduções


