

This tutorial is from Saturnella and was translated with your permission
Tutorial: Lovely, by Saturnella - Original HERE
Credits: Saturnella
Material - HERE
Plugins:
Unlimited 2 - BKG Designers sf10 II / Quilt
Carolaine and Sensibility / CS_Texture
Eye Candy 5: Impact / Glass
Mura's Meister / Copies
AAA Filters / Custom / Landscape
Graphic Plus / Quick Tile I
AAA Frame / Photo Frame
|
SCRIPT:

(CLICK ON PRINTS FOR VIEW BETTER)
01. Place color 1 in the Foreground and color 2 in the background


(CLICK ON PRINTS FOR VIEW BETTER)
01. Place color 1 in the Foreground and color 2 in the background
02. Open the alpha file (calque alpha_lovely) / Duplicate (Shift + D)
/ Close the original / Rename to Raster!
03. Paint with this Radial gradient

04. Adjust / Blur / Gaussian Blur: 30


05. Effects / Plugins / Unlimited 2 / BKG Designers sf10 II / Quilt

06. Add new layer
07. Paint with color 3
08. Layers / New Mask layer From Image / Mask (BebaGxSnValentin004)
/ INVERT MARKED


09. Adjust / Sharpness / Sharpen More
10. Merge Group
11. Rename the layer to "masque"
12. Selections / Load selection from alpha channel / Selection 1


13. Press Delete on your keyboard
14. Keep selected
15. Add new layer
16. Paint with the gradient
17. Add new layer
18. Copy the tube (sat_coe02) / Paste in the selection
19. Select None
20. Layers / Properties / Blend Mode: Multiply


21. Drop Shadow: 1 1 50 1 black
22. Merge Down
23. Activate the mask layer
24. Selections / Load selection from alpha channel / Selection 2


25. Press Delete on your keyboard
26. Add new layer
27. Paint with the gradient
28. Adjust / Blur / Gaussian Blur: 30


29. Effects / Plugins / Carolaine and Sensibility / CS_Texture

30. Edit / Repeat CS_Texture
31. Select None
32. Layers / Duplicate
33. Image / Mirror / Mirror Horizontal
34. Merge down
35. Layers / Properties / Blend Mode: Multiply


36. Drop Shadow: 0 0 60 21 color 1
37. Activate the mask layer
38. Selections / Load selection from alpha channel / Selection 3


39. Selections / Promote selection to layer
40. Paint the selection with color 2
41. Layers / Properties / Blend Mode: Multiply


42. Effects / 3D Effects / Inner Bevel

43. Drop shadow just like the previous one
44. Select None
45. Activate the top layer
46. Copy the tube (sat_deco01) / Paste it as a new layer
47. Image / Resize: 40% - all layers unchecked
48. Adjust / Sharpness / Sharpen
49. Drop Shadow: 0 0 60 31 black
50. Position according to the model
51. Copy the child's tube (satper05) / Paste it as a new layer
52. Image / Resize: 60% - all layers unchecked
53. Adjust / Sharpness / Sharpen
54. Drop Shadow just like the previous one
54.1 Position according to model
55. Copy the tube (sat_coe04) / Paste it as a new layer
56. Image / Resize: 30% - all layers unchecked
57. Adjust / Sharpness / Sharpen
58. Position according to model
59. Add new layer
60. Selections / Load selection from alpha channel / Selection 4


61. Paint the selection with color 1
62. Selections / Modify / Contract: 2


63. Paint the selection with color 2
64. Selections / Modify / Contract: 4


65. Fill the selection with color 1
66. Select None
67. Effects / Plugins / Eye candy 5: Impact / Glass
/ Preset (lovely-glass)

68. Effects / Plugins / Mura's Meister / Copies

69. Layers / Duplicate
70. Image / Mirror / Mirror horizontal
71. Activate the bottom layer - Raster 1
72. Effects / Plugins / AAA Filters / Custom / Landscape

73. Copy this layer (Edit / Copy) / paste as new layer / minimize
74. Image / Add borders / 1px / color 1
Image / Add borders / 3px / color 2
Image / Add borders / 1px / color 1
75. Selections / Select All
76. Image / Add borders / 25px / color 3
77. Selections / Invert
78. Paint with the gradient
79. Effects / Texture Effects / Weave color 3 color 1

80. Effects / 3D Effects / Inner Bevel same as above


81. Select None
82. Image / Add borders / 1px / color 1
Image / Add borders / 3px / color 2
Image / Add borders / 1px / color 1
83. Selections / Select all
84. Image / Add borders / 50px / color 3
85. Selections / Invert
86. Copy and paste the image copied in item 73 into the selection
87. Effects / Texture Effects / Blinds - Color 1

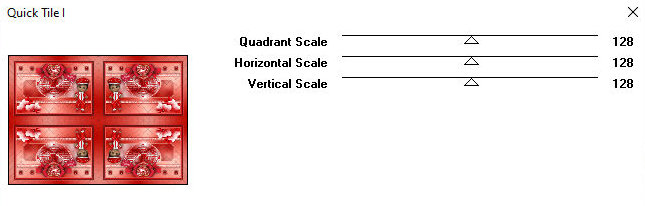
88. Effects / Plugins / Graphic Plus / Quick Tile I / Default

89. Effects / Plugins / AAA Frame / Photo Frame

90. Selections / Invert
91. Drop Shadow: 0 0 80 40 black
92. Select None
93. Place your signature
94. Image / Add borders / 1px / black
95. Image / Resize: Width 900px
96. Adjust / Sharpness / Unsharp Mask

97. Save: File / Export / Jpeg Optimizer
Thank you for doing my translations
Nenhum comentário:
Postar um comentário
Observação: somente um membro deste blog pode postar um comentário.