This tutorial is by Bea and has been translated with your permission.
Original here
******
Material - Download HERE
******
Credits:
Ana Ridzi
Luz Cristina
******
Plugins:
Eye Candy 5: Impact / Perspective Shadow
Flaming Pear / Flexify 2
AAA Frame / Texture Frame
Plugins - Here
******
My email:
Send me your versions or let me know if
have problems with the material or tutorial
******
Check out their versions HERE
******
Before you begin:
Double-click the preset (Shadow_Entrelazados_Bea) to export to the plugin.
Click on the prints for a better view.
******
01. Open a new image with 1000x600px
02. Activate the Selection Tool / Custom Selection and configure:
03. Put color # deb53d in foreground and color # 630100 in background
04. Prepare a Rectangular Gradient
05. Fill the selection with this gradient.
06. Select None
07. Effects / Plugins / Flaming Pear / Flexify 2
08. Layers / Duplicate
09. Image / Flip
10. Merge visible
11. Effects / Plugins / Eye Candy 5: Impact / Perspective shadow / Preset (Shadow_Entrelazados_Bea)
If you want, you can change the color in Basic: Shadow Color and uncheck Reflect Selection color to match the color you are using.
12. With Magic Wand, click inside the image to select
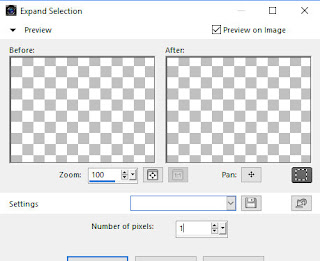
13. Selections / Modify / Expand: 1
14. Open tube (AR16) / Copy and paste to selection
15. Select None
16. Layers / New Raster Layer
17. Fill in the gradient
18. Layers / Arrange / Move down
19. Effects / Texture Effects / Fur
20. Enable upper layer
21. Open tube (953-luzcristina) / Copy and paste as new layer
22. Effects / Image Effects / Offset (-253/30)
22.1 Apply a Drop Shadow of Your Own (Optional)
23. Merge visible
24. Effects / Plugins / AAA Frame / Texture Frame
25. Save: File> Export> JPEG OPtimizer
Thank you for doing my translations.
Another version
Tube: Nena Silva


Nenhum comentário:
Postar um comentário
Observação: somente um membro deste blog pode postar um comentário.