Magic of Season
This tutorial is from soxikibem and has been translated with your permission
Original here
******
Required material:
1 landscape misted tube
1 main tube
1 wordart
(material not supplied)
******
Tubes:
Sassy Mists and Tubes
Wordart - aqui
******
Plugins:
Xero
You can find it on the blog - HERE
******
My Email - HERE
* Submit your versions
* Let me know if you have problems with the tutorial or material
******
See their versions - HERE
******
SCRIPT:
01. Open your material in psp / Duplicate (Shift + D) / Close the originals
02. Open the landscape misted / Copy
03. Open a new image with 900x500px.
04. Paint with a chosen color. Here I used the color # f3fec8.
05. Select All / Paste into Selection / Select None.
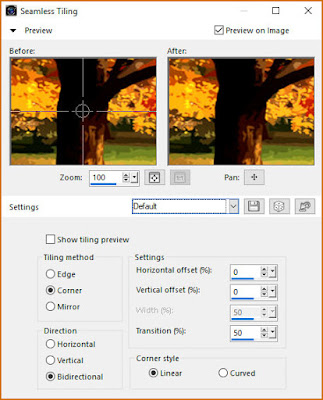
06. Effects / Image Effects / Seamless Tiling / Default.
07. Adjust / Blur / Motion Blur - Apply 2 times.
08. Effects / Edge Effects / Enhance - Apply 2 times.
09. Effects / Distortion Effects / Lens Distortion
10. Image / Resize: 80% - all layers unchecked
11. Layers / Duplicate
12. Effects / Geometric Effects / Perspective Horizontal
13. Repeat the Geometric Effects / Horizontal Perspective by changing the value to 95
14. Effects / Distortion Effects / Wave
15. Activate the Eraser Tool and delete the parts of the curved line that were in front of the rectangle as shown in the print. You can also use the Freehand Tool, select the part you want to delete and click Delete on your keyboard.
16. Drop shadow: 0 0 100 20 - black
17. Merge Down
18. Drop Shadow: 0 0 75 40 - black
19. Open the Misted of Paysagem / Copy and paste as new layer
20. Resize and position as model.
21. Activate the Eraser Tool and delete the parts of the image that were on the curved line or outside the frame
22. Activate the Raster layer 1
23. Effects / Photo Efects / Film and Filters (It's a PSP Effects)
N.A .: In Creative Filters, choose another filter if you prefer. It will depend on the colors of your work
24. Activate the layer Raster 2
25. Effects / Texture Effects / Weave
26. Effects / Plugins / Xero / Porcelain / Default
27. Open your main tube / Copy and paste as new layer
28. Position as you prefer
29. Decorate as you wish
30. Place your signature
31. Merge Visible
32. Activate the Selection Tool and click on the opaque layer / Image / Crop to selection
33. Save in PNG format
Thank you for doing my translations.
My version with tubes: Isa and OBG
Other version with tubes: Maryze


Nenhum comentário:
Postar um comentário
Observação: somente um membro deste blog pode postar um comentário.