


This tutorial is from Inacia Neves and has been translated with your permission
Original here

******
Necessary materials:
1 Tube Character
1 Tube misted Landscape
1 Wordart (in the material) - HERE
******
Tubes:
Mary
******
Plugins:
Mura's Meister / Pole Transform
Simple / 4 way average
You can find some blog plugins - HERE
******
My Email - HERE
* Submit your versions
* Let me know if you have problems with the tutorial or material
******
See their versions - HERE
******
SCRIPT:
01.Open the misted tube of landscape / Copy
02. Open a new image with 1000x600px
03. Selections / Select All
04. Paste in the selection the image copied in item 01
04.1 Select None
05. Effects / Image Effects / Seamless Tiling / Default


06. Adjust / Blur / Motion Blur

07. Repeat Motion Blur
08. Effects / Edge Effects / Enhance
09. Layers / Duplicate - Apply 2 times
10. Close the visibility of the Copy (2) of Raster 1 and Raster 1 layers by clicking on the eye
11. Activate the Copy of Raster 1 layer
12. Effects / Geometric Effects / Perspective Horizontal

13. Repeat the Geometric Effects / Horizontal Perspective with Distortion: -97


13.1 Picture


14. Effects / Distortion Effects / Wave:

15. Image / Free Rotate / Left: 45


16. Image / Mirror
17. Effects / Image effects / Offset (100/0)


18. Layers / Duplicate
19. Merge down
20. Close the visibility of the Copy of Raster 1 layer by clicking on the eye
21. Open the visibility and activate the Copy (2) of Raster 1 layer by clicking on the eye
22. Effects / Geometric Effects / Circle


23. Repeat this effect
24. Image


25. Image / Resize: 30% - all layers unchecked
26. Effects / Plugins / Mura's Meister / Pole Transform

26.1 Image


27. Open the view of the Copy of Raster 1 layer so you can see the placement of the flowers
28. Keep the Copy (2) of Raster 1 layer active
29. Image / Mirror
30. Effects / Image Effects / Offset (-10 / -15)


31. Layers / Duplicate
32. Image / Mirror
33. Image / Free Rotate / Left: 30


34. Effects / Image Effects / Offset (95 / -15)


35. Layers / Duplicate
36. Image / Free Rotate / Left: 30
37. Effects / Image Effects / Offset (-150/190)


38. Layers / Duplicate
39. Image / Mirror
40. Image / Free Rotate / Left: 45
41. Effects / Image Effects / Offset (-150/30)


42. Layers / Duplicate
43. Image / Free Rotate / Left: 30
44. Effects / Image Effects / 345 / -345


45. Layers / Duplicate
46. Image / Mirror
47. Image / Free Rotate / Left: 75


48. Effects / Image Effects / Offset (600 / -100)


48.1 Picture


49. Keep the Raster layer 1 visibility closed and close the view of the Copy of Raster 1 layer
50. Activate any of the other layers / Merge Visible
51. Activate the layer Merged
52. Drop Shadow: -10 -10 100 30 - black
53. Adjust / Sharpness / Sharpen More
54. Open the Raster layer 1 visibility and activate
55. Effects / Plugins / Simple / 4 way average
56. Effects / User Defined Filter / Emboss 3
57. Close the visibility of this layer again.
58. Open the visibility and activate the Copy of Raster 1 layer.
59. With Magic Wand, select the right side of the image (right side from the stem)
59.1 Picture


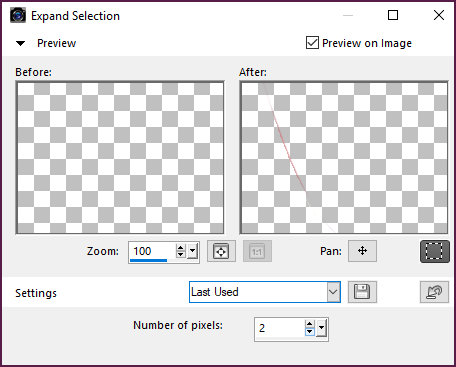
60. Selections / Modify / Expand: 2

61. Layers / New Raster Layer
62. Layers / Arrange / Move Down
63. Fill in this layer with a Linear gradient, formed by 2 colors taken from the image / Dark color in the foreground / In the tutorial model the colors were used: # 951907 and # fcb634:
* Linear 0 0 des


64. Effects / Distortion Effects / Pixelate
* 30 x

64.1 Image

65. Effects / User Defined Filter / Emboss 3
66. Open the visibility and activate the Raster layer 1
68. Select None
69. Activate the Copy of Raster 1 layer (stem)
70. Drop Shadow: 10 10 100 30 - black
71. Repeat Drop Shadow
72. Activate the layer Raster 2
73. Open the tube misted of Landscape / Copy and paste as new layer
74. Position the image on the right side
74.1 Picture


75. With the Eraser Tool, delete the parts of the landscape that appear on top or the left side of the stem
N.T .: To make it easier to see the parts to be erased, you can close the Raster layer 1, erase and then reopen the layer
76. Layers / New Raster Layer
77. Fill with gradient
78. Layers / Arrange / Send to bottom
79. Layers / Properties / Blend Mode: Difference (or other)
80. Layers / New Raster Layer
81. Fill in the layer with the dark color
82. Layers / Arrange / Send to bottom
83. Merge All (Flatten)
84. Edit / copy
85. Image / Add borders / 50px / white or some contrasting color
86. Select this border with Magic Wand
87. Paste in the selection the image copied in item 84
88. Image / Mirror
89. Adjust / Blur / Gaussian Blur: 10


90. Selections / Invert
91. Drop Shadow: 10 10 100 50 - black
92. Repeat Drop Shadow on negative: -10 -10 100 50 - black
93. Select None
94. Activate the top layer
95. Open your main tube / Copy and paste as new layer
96. Resize if necessary
97. Apply a Drop Shadow of your choice
98. Adjust / Sharpness / Sharpen
99. Layers / New Raster Layer
100. Place your signature
101. Open your wordart / Copy and paste as new layer /
102. Position as you wish
103. Image / Add borders / 1px / black
104. Save as JPEG

Nenhum comentário:
Postar um comentário
Observação: somente um membro deste blog pode postar um comentário.