


Tutorial de Libellule, original aqui

Nesta tradução, foi usado o PSP X7, mas pode ser feito com qualquer versão do PSP
Material: aqui
Tube: Libellule
Plugins: (aqui) Adjust / VM Texture / CPK Designs / Toadies / Unlimited 2 / photo Aging Kit / Nik Software / Eye Candy 5 : Impact / Graphic Plus
Cores usadas;

Clique para ver suas versões

ROTEIRO:
1. Abrir o canal alpha *alpha_emphase*
2. Duplique (shift+D). Feche o original
3. Selections - Select all
.
4. Abrir a imagem *emphase_fond* - Copiar
Nota: Se usar outras cores, você pode colorizar usando o Nik Software ou Colorize ou outra forma.
5. Retornar para sua tag e colar na seleção
6. Select None
Nota: Se usar outras cores, você pode colorizar usando o Nik Software ou Colorize ou outra forma.
5. Retornar para sua tag e colar na seleção
6. Select None
7. Effects - Plugins - Adjust - Variations
Selecione: Midtones - Depois clique em More Red e Darker. Veja o print

Selecione: Midtones - Depois clique em More Red e Darker. Veja o print
8. Adjust - Blur - Radial Blur

9. Adjust - Brightness and Contrast - Brightness/Contrast


9. Adjust - Brightness and Contrast - Brightness/Contrast

10. Effects - Plugins - Unlimited 2 - VM Texture - tile a gogo

11. Effects - Plugins - CPK Designs - Mirror - Default
12. Effects - Edge Effects - Enhance
13. Effects - Plugins - Toadies - *Sucking Toad* Bevel II.2


14. Selections - Load/Save selections - Load selection from alpha channel - selection #1
15. Selections - Promote selection to layer
16. Select None
17. Layers- Properties - Blend Mode: Hard Light - Opacidade: 70%
17. Layers- Properties - Blend Mode: Hard Light - Opacidade: 70%
18. Effects - Plugins - Toadies - 3D Supercherkers (com S)

19. Effects - Plugins - Toadies - What are you?


20. Effects - Image Effects - Seamless Tiling - Side by Side


21. Adjust - Sharpness - Sharpen
22. Ative a 'Pick Tool'
22. Ative a 'Pick Tool'
23. Selections - Load/Save selections - Load selection from alpha channel - Selection #2
24. Pressione Delete em seu teclado
25. Select None
26. Layers - New Raster Layer Preencher com a cor 4 com a 'Flood fill' configurada com opacidade: 50%
27. Abrir a mask *creation.tine masque 125*
28. Layers - New Mask Layer - From Image

29. Merge Group
30. Layers - New Raster Layer - Preencher com a cor 4 com a 'Flood Fill' configurada com opacidade 100%
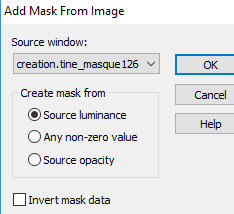
31. Abrir a mask *creation.tine masque 126
32. layers - New Mask Layer - From image
33. Effects - edge Effects - Enhance
34. Merge Group
35. Layers - properties - Opacidade:55%
36. Selections - Load/save selection - Load selections from alpha channel - Selection #3
37. Selections - promote selection to layer
38. Coloque a cor 1 no Foreground
39. Ative a 'Color Change' - clique sobre um dos quadros brancos
40. Layers - Properties - Blend mode:Multiply
41. Select None
41.1 A imagem estará assim

42. Ative a layer Group - Raster 2 (layer da mask 126)
43. Selections - Load/Save selections - Load selection from alpha channel - Selection #4
44. Pressione a tecla Delete de seu teclado
45. Layers - New Raster Layer
46. Preencha a layer com a cor 3
47. Selections - Modify - Contract:2px
48. Preencha com a cor 2
49. Selections - Modify - Contract: 5px
50. Preencha com a cor 3
51. Selections - Modify - Contract:2px
52. Preencha com a cor 2
53. Effects - Plugins - Photo Aging Kit - Dust & Scratches - Dewfault

53.1 Mantenha a seleção
.
54. Effects - Edge Effects - Enhance
54. Effects - Edge Effects - Enhance
55. Abrir o tube *emphase_decor1* - Copiar
56. Voltar para a sua tag. Layers - New Raster Layer
57. Colar na seleção
58. Select None
59. Ative a layer superior
60. Abrir o tube *emphase_decor2* - copiar
.
61. Retornar para sua tag - Colar como nova layer
61. Retornar para sua tag - Colar como nova layer
62. Object - Align - Top
63. Effects - Plugins - Nik software color Effex 3.0 Complete - Photo Stylizer

64. Drop shadow: 0 0 60 30 preto

65. Effects - Sharpness - Sharpen
66. Abra o tube *libellulegraphism_marionette*- Retire a marca d'água - Copie
67. Volte para a sua tag - Cole como nova layer
68. Image - Resize: 65% - Resize all layers desmarcado
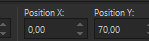
69. Ative a 'Pick Tool' e configure:

70. Adjust - Sharpness - Sharpen
71. Layers - Duplicate
72. Ative a layer abaixo
72.1 Adjust - Blur - Gaussian Blur:10px
73. Layers - Properties - Blend Mode: Multiply - Opacidade: 48%
74. Ative a layer acima (Copy or Raster 5)
75. Drop shadow: 0 0 30 20 preto
76. Effects - Plugins - Eye Candy 5: Impact - Perspective Shadow - Preset: *Libellule-Emphase*

77. Abrir o tube *wuerfel-muster-bispiel-bd-4-3-16* - Retire a marca d'água - Copie
78. Volte para sua tag - Cole como nova layer
79. Image - Resize:30% - resize all layers desmarcado
79.1 Posicione à esquerda (veja o modelo)
80. Adjust - Sharpness - Sharpen
81. Drop shadow: 0 0 30 20 preto

82. Layers - duplicate
83. Image - Flip - Flip Vertical
83.1 Posicione conforme o modelo

84. Layers - Arrange - Move down
85. Layers - properties - Opacidade:32
86. Image - Add Borders - symmetric marcado - 2px - cor 3
87. Image - Add Borders - symmetric marcado - 5px - cor 2
88. Image - Add borders - symmetric marcado - 2px - cor 3
89. Image - Add borders - symmetric marcado - 10px - cor 4
90. Select all
91. Image - Add borders - 15px - cor #b1693c
92. Selections - Invert
93. Effects - Plugins - Graphic plus - Cross Shadow - Default

94. Select All
95. image - Add borders - symmetric marcado - 45px - cor 4
96. Drop shadow: 0 0 60 30 preto
97. Select None
98. Abrir *emphase_decor3* - Copiar
99. Volte para sua tag - Cole como nova layer
100. Adjust - Sharpness - Sharpen
101. Drop shadow: 1 1 100 1 - preto

102. Image - Add borders - symmetric marcado - 2px - cor 3
103. Image - Add borders - 5px - cor 2
104. Image - Add borders - symmetric marcado - 2px - cor 3
105. Coloque as assinaturas - Merge all (flatten)
106. Salve como JPEG
Obrigada por fazer minhas traduções.
Por favor, coloque um link para a minha tradução.
Envie sua versão para mim, vou adorar colocar no meu blog.
Para melhorar a qualidade de minhas traduções, por favor, me avise se encontrar alguma dificuldade na tradução.


Nenhum comentário:
Postar um comentário
Observação: somente um membro deste blog pode postar um comentário.