domingo, 3 de maio de 2020

Naise M - Angela das Graças


This tutorial is by Naise M and has been translated with your permission


Tutorial Angela das Graças, de Naise M

Original AQUI
Créditos Tube principal: Lily Garnier

Outros materiais: Naise
Material AQUI
Plugins do tutorial Plugins:
Toadies
Simples
AAA Frame
Texture
Unlimited 2
Plugins do blog  AQUI
  Contatos  Meu e-mail: AQUI
Meu grupo no Facebook: : AQUI
Suas versões: AQUI


SCRIPT:


(click on the prints for a better view)

01. Open a new transparent image with 950x600px

01.1 place the color #ffffff in the foreground and the color # ab4e63 in the background

02. prepare a linear gradient and paint the image


03. effects / plugins / unlimited 2 / simple / pizza slice mirror

04. layers / duplicate

05. image / mirror / mirror horizontal

06. layers / properties / blend mode: exclusion

07. merge visible

08. effects / plugins / unlimited 2 / bkg designer sf10 I / cruncher


09. effects / edge effects / enhance more

10. open the tube (deco-1) on psp / activate the layer raster 2

11. effects / plugins / nik software / color efex pro 3.0 / bi-color filters (optional) / violet / pink 2


12. copy and paste as a new layer in your work

13. activate the pen tool and configure according to the print. (The preset (small dash) is in the material)


14. add a new layer

15. draw a line according to the print, using the Linear gradient
(Note: for the line to come out perfectly, click shift along with the mouse button)

15.1 layers / convert to raster layer

16. layers / duplicate

17. image / mirror / mirror vertical (flip)

18. open the tube (deco-2) on psp

19. colorize as you wish
(Note: use: Hue and saturation / colorize or the Change Color tool)

20. copy and paste as new layer

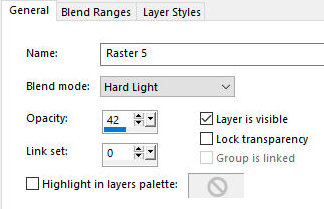
21. layers / properties / blend mode: hard light

22. image / add borders / 64px / color #ffffff

23. effects / plugins / aaa frames / foto frame


24. select the white part of the outside edge with the magic wand

25. effects / plugins / aaa frames / texture frame


26. select none

27. select the white part inside the border with the magic wand

28. selections / promote selection to layer

29. effects / plugins / unlimited 2 / bkg designer sf10 I / cruncher


30. effects / user defined filter / edge-enhance-more (the preset is in the material)

31. drop shadow: 1 1 93 4.35 black

32. image / add borders / 6px / color # ab4e63

33. add new layer

34. activate the Paint Brush tool / locate the brush (KJC_CuteLilWorm 001) /
configure according to the print / stamp in the location indicated with the gradient
(Note: brush on the material. Export as a brush)


35. drop shadow: 1 0 74 5.80 black

35.1 layers / Duplicate / Image / Mirror / Image / flip

36. copy your main tube and paste it as a new layer

37. Make adjustments: size, drop shadow, etc.

38. position as desired

39. copy the tube (name) and paste it as a new layer

40. position according to model or as desired

41. copy your flower tube and paste it as a new layer

42. Make the necessary adjustments (size, drop shadow)

43. position as desired or as the model

44. layers / properties / blend mode: overlay (or according to your colors)

45. image / resize: width 1000px

46. ​​place your signature

47. merge all

48. save: file / export / jpeg optimizer


Thank you for doing my translations


Belinda - Without Dreams


Este tutorial é de Belinda Graphics e foi traduzido com a sua permissão


Tutorial Without Dreams, de Belinda Graphics

Original AQUI
Créditos Tube feminino e paisagem: Nicole
Material AQUI
Plugins do tutorial Plugins:
Carolaine and Sensibility / CS-HLines
Mehdi / Wavy Lab 1.1 / Sorting Tiles
Graphic Plus / Cross shadow
Muras's Meister / perspective tiling / Copies
Plugins do blog  AQUI
  Contatos  Meu e-mail: AQUI

Meu grupo no Facebook: AQUI

Suas versões: AQUI


ROTEIRO:


(clique nos prints para visualizar melhor)

01. abra o arquivo alpha (apha without dreams) / duplique (shift+d) / feche o original

02. coloque a cor #706c60 no foreground e a cor #d5cec4 no backgorund

03. effects / plugins / mehdi / wavy lab 1.1

04. selections / load selection from alpha channel / selection 1

05. selections / promote selection to layer

06. select none

07. effects / texture effects / texture (grid)

08. drop shadow: 1 1 50 30 preto

09. repita o drop shadow em negativo: -1 -1 50 30 preto

10. ative a layer raster 1

11. effects / plugins / mehdi / sorting tiles

12. effects / edge effects / enhance

13. adicione nova layer

14. selections - select all

15. copie o tube (nicole-paysage2-2020) e cole na seleção

16. select none

16.1 layers / properties / blend mode: luminance (l)

17. ative a layers raster 1

18. layers / duplicate

19. effects / plugins / mura's meister / perspective tiling

20. as layers estarão assim: 

21. ative a layer superior (promoted selection)

22. copie o tube (nicole-femme7-2020) e cole como nova layer

23. image / mirror / mirror horizontal

24. ative a pick tool e configure conforme o print: (127/215) / pressione M

25. Copie o tube (rond) e cole como nova layer

26. posicione no canto superior esquerdo (veja o modelo)

27. layers / duplicate

28. image / mirror / mirror horizontal(mirror)

29. image / mirror / mirror vertical (flip)

30. merge down

30.1 layers / properties / blend mode: luminance (l)

31. copie o tube (texte) e cole como nova layer

32. ative a pick tool e configure conforme o print (449/204) / pressione M

33. effects / plugins / mura's meister / copies
(Nota: Clique apenas uma vez em <<1/n fade out>> senão o efeito poderá ficar diferente)

34. layers / properties / opacity: 89%

35. image / add borders 1p / cor do background

36. image / add borders / 30px / cor do foreground

37. selecione esta borda de 30px com a magic wand

38. effects / plugins / graphic plus / cross shadow

39. select none

40. image / add borders / 1px / cor do background

41. image / add borders / 40px / cor do foreground

42. selecione esta borda de 40px com a magic wand

43. effects / plugins / carolaine and sensibility / cs-hlines

44. select none

45. File / Script / Run Multiple Scripts /
Clique 2 vezes em Full image drop shadow(lado esquerdo) /
clique em Full image drop shadow pra selecionar (lado direito) /clique em run 


46. image / resize: 1000px(width)

47. coloque sua assinatura

48. salve: file / export / jpeg optimizer


Obrigada por fazer minhas traduções


Jolcsi - I Like Flowers


Este tutorial é de Jolcsi e foi traduzido com a sua permissão


Tutorial I Like Flowers - de Jolcsi

Original AQUI
Créditos Misted: Luz Cristina
Material AQUI
Plugins
do
tutorial
Plugins:
Mehdi / Wavy Lab 1.1
Unlimited 2
Simple / 4 Way Average
Flaming Pear / Flexify 2
AP [Lines] / Lines-SilverLining
Plugins
do
         blog                         
AQUI
  Contatos  Meu e-mail: AQUI
Meu grupo no Facebook: AQUI
Suas versões: AQUI


ROTEIRO


(clique nos prints para visualizar melhor)

01. coloque a cor 1 no foreground e a cor 2 no background
(consulte a tabela de cores no material)

02. abra uma nova imagem transparente com  900x550px

03. effects / plugins / mehdi / wavy lab 1.1


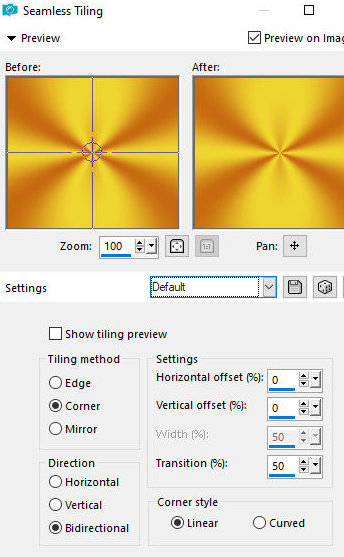
04. effects / image effects / seamless tiling / default

05. layers / duplicate

06. effects / geometric effects / skew


07. effects / plugins / flaming pear / flexify 2


08. resultado:

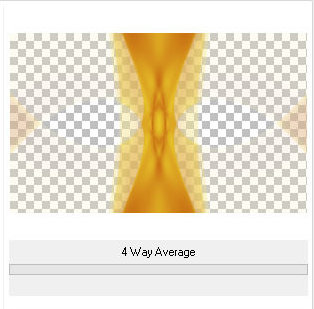
09. effects / plugins / unlimited 2 / simple / 4 way average / default

10. ative a layer raster 1

11. adjust / blur / gaussian blur:30

12. adicione nova layer

13. pinte com a cor 2

14. layers  new mask layer / from image / mask (hjr-sigma)

15. effects / edge effects / enhance

16. merge group

17. ative a selection tool / custom tool e configure conforme o print


18. edit / cut

19. select none

20. adicione nova layer

21. pinte com a cor 1

22. layers / new mask layer / from image / mask (mask-md-092)

23. merge group

24. ative a layer copy of raster 1

25. effects / plugins / AP [lines] / lines-silverlining


26. copie o tube (jolcsi592) e cole como nova layer

27. image / resize: 80% - all layers desmarcado

28. ative a pick tool e configure conforme o print (375/-52) / pressione M

29. adjust / sharpness / sharpen

30. layers / duplicate

31. layers / arrange / move down - aplique 3 vezes

32. image / mirror

33. layers / properties / blend mode: soft light / opacity: 65%

34. ative a layer superior - raster 2

35. copie o tube (text) e cole como nova layer

36. image / resize: 70% - all layers desmarcado

37. ative a pick tool e configure conforme o print: (17/228) / pressione M

38. selections / select all

39. selections / float / selections / defloat

40. apague o conteúdo da seleção com a eraser tool

41. pinte com uma cor de sua escolha

42. select none

43. drop shadow: 2 1 51 1 cor 3

44. image / add borders / 2px / cor 2

45. selections / select all

46. image / add borders / 10px / cor 1

47. selections / invert

48. effects / plugins / AP [Lines] / lines-silverlining igual ao anterior

49. select none

50. image / add borders / 1px / cor 2

51. image / add borders / 1px / cor 1

52. selections / select all

53. image / add borders / 45px / cor 2

54. drop shadow: 0 0 69 30 cor 3

54.1 select none

55. coloque sua assinatura

56. merge all

57. salve: file/ export / jpeg optimizer


Obrigada por fazer minhas traduções