


Este tutorial é de Huzunlu Yillar para o PSP Arena e foi traduzido com a sua permissão
ROTEIRO:

(Clique nos prints para visualizar melhor)
01. Coloque a cor #b70952 no foreground e a cor #a5ace0 no background

02. Abra uma nova imagem transparente com 900x550px
03. Effects / Plugins / Mehdi / Wavy Lab 1.1
Seq. cores: 1-2-3-4

04. Adjust / Blur / Radial Blur

05. Image / Mirror / Mirror Horizontal
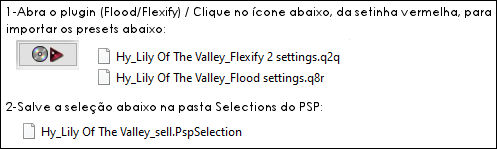
06. Effects / Plugins / Flaming Pear / Flood (cor: #481f68)

Nota: Se o preset não funcionar importando pelo plugin, configure conforme o print
07. Layers / duplicate
08. Effects / Plugins / Mehdi / Sorting Tiles

09. Effects / Plugins / Transparency / Eliminate White
10. Selections / Load selection from alpha channel / Selection (Hy_Lily Of The Valley_Sell)


11. Pressione Delete em seu teclado 3 vezes
12. Select None
13. Layers / Properties / Blend Mode: Screen / Opacity: 59


14. Effects / Edge Effects / Enhance More
15. Layers / duplicate
16. Effects / Plugins / Flaming Pear / Flexify2

17. Layers / Properties / Blend Mode: Hard Light / Opacity 59%


18. Copie o tube (Hy_Lily Of The Valley_Deko) / Cole como nova layer
19. Adicione nova layer
20. Pinte com a cor #ffffff
21. Layers / New Mask Layer / From Image / Mask ( Hüzünlüyıllar_mask_18 Halftone_14)
INVERT MARCADO


22. Merge Group
23. Layers / Properties / Blend Mode: Overlay / Opacity: 42px


24. Copie o tube (Hy_Lily Of The Valley_Deko_1) / cole como nova layer
25. Ative a Pick Tool e configure: (233/326) / Pressione M


26. Layers / Properties / Blend Mode: Overlay


27. Copie o tube (Hy_Lily Of The Valley_Deko_2) / Cole como nova layer
28. Copie o tube (Hy_Lily Of The Valley_Deko_3) / Cole como nova layer
29. Layers / Properties / Blend Mode: Luminance (L)


30. Copie o tube ( Hy_Lily Of The Valley_Deko_4) / Cole como nova layer
31. Ative a Pick Tool e configure (0/-2) / Pressione M


32. Copie o tube (Hy_Lily Of The Valley_Deko_5) / Cole como nova layer
33. Copie o tube (Hy_Lily Of The Valley_Deko_6) / Cole como nova layer
34. Ative a Pick Tool e configure: (500/0) / Pressione M


35. Copie o tube (Hy_Lily Of The Valley_Deko_7) / Cole como nova layer
36. Copie o tube (Hy_Lily Of The Valley_Deko_8) / Cole como nova layer
37. Ative a Pick Tool e configure (801/6) / Pressione M


38. Copie o tube (Hy_Lily Of The Valley_Deko – 23_fleurs_animabelle_page3)/
Cole como nova layer
39. Ative a Pick Tool e configure: (301/95) / Pressione M


40. Copie o tube (Hy_Lily Of The Valley_Deko_9) / Cole como nova layer
41. Ative a Pick Tool e configure: (236/32) / Pressione M


42. Image / Add borders / 1px / #481f68
Image / Add borders / 5px / #ffffff
Image / Add borders / 1px / #481f68
Image / Add borders / 35px / #ffffff
Image / Add borders / 1px / #481f68
43. Effects / Plugins / AAA Frames / Foto Frame

44. Copie o texto(Hy_Lily Of The Valley_Text – Aslı_Text) / Cole como nova layer
45. Ative a Pick Tool e configure: (134/398) / Pressione M


46. Coloque sua assinatura
47. Merge All
48. Image / Resize: Width 900px
49. Salve: File / Export / Jpeg Optimizer
Obrigada por fazer minhas traduções
Nenhum comentário:
Postar um comentário
Observação: somente um membro deste blog pode postar um comentário.