Mostrando postagens com marcador Vera mendes. Mostrar todas as postagens

domingo, 31 de maio de 2020

Maria José - Vera Mendes


This tutorial is from Maria Jose and was translated with your permission

Thank you Maria José, for having done this tutorial in my honor. I feel very honored and happy.

******


Tutorial Original: HERE

******

Credits:
Lily Garnier / Maria José

******

Material:

******

Plugins:

Simple
Mehdi
L en K's
Kiwi

Eye Candy 5: impact

Download: HERE

******

Contacts:

E-mail: HERE
Facebook: HERE
Your Versions: HERE

******

Remembering:


* Change the blend mode and opacity of the layers and apply drop shadow according to your tubes.

* The Pick Tool in older versions of the PSP is called Deformation

* In old PSP versions:
Mirror / Mirror Horizontal = Mirror
Mirror / Mirror Vertical = Flip

******

Guidelines:


* Double click on the Alien Skin preset to export to the plugin

* Save selections in the PSP Selections folder

* Save the texture in the Textures folder of the PSP

******


SCRIPT


(click on the prints for a better view)


01. put the color # ac9cd2 in the foreground and the color # 26193b in the background


02. prepare a linear gradient


03. open a new transparent image with 900x600px


04. fill with the gradient above


05. effects / plugins / simple / pizza slice mirror


06. effects / edge effects / enhance


07. effects / plugins / simple / top left mirror


08. effects / plugins / mehdi / sorting tiles


09. selections / select all


10. Copy this layer (it will remain in memory)


11. image / add borders / 50px / background color


12. selections / invert


13. Paste the image copied above into the selection


14. select none


15. effects / image effects / seamless tiling


16. selections / load selection fom disk / selection (veramendes-mj)


17. selections / promote selection to layer


18. keep selection


19. effects / plugins / l & k's / l & k's zitah


20. effects / plugins / ° v ° kiwi oelfilters / zig-zack


21. drop shadow: 0 0 80 40 black


22. selections / invert


23. repeat the drop shadow


24. select none


25. effects / reflection effects / rotating mirror


26. effects / plugins / simple / top left mirror


27. open the tube (deco-1-veramendes-mj) / copy and paste as a new layer


28. layers / arrange / move down


29. layers / properties / blend mode: screen


30. open the tube (deco-veramendes) copy and paste as a new layer


31. layers / properties / opacity: 50%


32. activate the promoted selection layer


33. selections / load selection from disk / selection (veramendes-1-mj)


34. selections / promote selection to layer


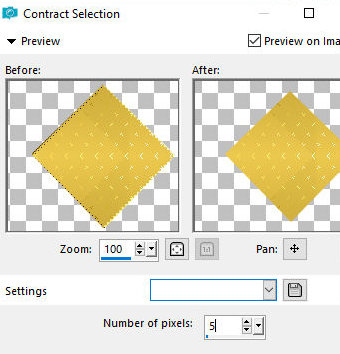
35. selections / modify / contract: 5px


36. effects / texture effects / texture (grid)


37. effects / plugins / eye candy 5: impact / glass

preset (glass-majo)


38. select none


39. layers / duplicate


40. image / resize: 50%


41. effects / image effects / offset (36/170)


42. layers / duplicate


43. image / mirror / mirror horizontal (mirror)


44. merge down


45. effects / plugins / simple / top left mirror


46. ​​activate the layer below - promoted selection 1

47. image / resize: 50%


48. effects / image effects / offset (140/0)


49. layers / duplicate


50. image / mirror / mirror horizontal (mirror)


51. merge down


52. open the tube (text VM)

(note: color according to the colors of your work)

53. drop shadow: 5 5 50 5 color # 26193b


54. open the tube (5110 - luz cristina) / copy and paste as a new layer


55. image / resize: 95%


56. position as desired


57. drop shadow of your choice


58. The layers will look like this:


59. image / add borders / 1px / dark color

image / add borders / 3px / light color
image / add borders / 1px / dark color

60. selections / select all


61. copy this layer (it will remain in memory)


62. image / add borders / 50px / white


63. selections / invert


64. paste the image copied above into the selection


65. adjust / blur / gaussian blur: 20


66. effects / plugins / l & k's / l & k's zitah

same as the previous


67. effects / plugins / ° v ° kiwi oelfilters / zig-zack

same as the previous


68. adjust / sharpness / sharpen


69. selections / invert


70. drop shadow: 0 0 80 40 black


71. select none


72. image / add borders / 1px / dark color


73. place your signature


74. merge all


75. image / resize: 1000px (width)


76. save: file / export / jpeg optimizer


Thank you for doing my translations

Ceylan - Vera Mendes


Este tutorial é de Ceylan e foi traduzido com a sua permissão.

Obrigada Ceylan, por ter feito feito este tutorial em minha homenagem. Me sinto muito honrada e feliz.


******

Tutorial original: AQUI


******

Créditos:

Grisi / Ceylan


******

Material

******

Plugins:

Eye Candy 5: Impact 
Eye Candy 5: Nature
BKG Designers sf10 IV
Toadies

Download:  AQUI


******

Contatos:

E-mail: AQUI
Facebook: AQUI
Suas versões: AQUI

******

Lembrando:

*Modifique o blend mode e a opacidade das layers e aplique drop shadow de acordo com seus tubes.

*A ferramenta Pick Tool em versões antigas do PSP é chamada Deformation

*Em versões antigas do PSP:
Mirror / Mirror Horizontal = Mirror
Mirror / Mirror Vertical = Flip


******


Orientações:

*Clique duas vezes nos presets Alien Skin, para exportar para o plugin

*Salve as seleções na pasta Selections do PSP


******


ROTEIRO:


(clique nos prints para visualizar melhor)

01. coloque a cor #ff8000 no foreground e a cor #ffffff no background

02. abra uma nova imagem transparente com 950x600px

03. pinte a imagem com a cor do foreground

04. effects / plugins / eye candy 5: nature / smoke
preset (ceylan)


05. effects / plugins / unlimited 2 / bkg designers sf10 IV / @instant tile


06. adjust / sharpness / sharpen

07. abra o tube (decoceylan-1) / copie e cole como nova layer

08. layers / properties / blend mode: luminance


09. merge visible

10. resultado


11. adicione nova layer

12. pinte com a cor do background

13. abra a mask (0_11ff13_758ff2e7_orig)

14. layers / new mask layer / from image / mask acima


15. merge group

16. layers / properties / blend mode: screen


17. adicione nova layer

18. pinte com a cor do background

19. abra a mask (empty-1400x1050)

20. layers /  new mask layer / from image


21.merge group

22. layers / properties / blend mode: soft light


23. adicione nova layer

24. selections / load selection from disk / selection (arrow)


25. pinte a seleção com a cor do background

26. select none

27. drop shadow: 0  0  30  3  preto

28. adicione nova layer

29. selections / load selection from disk / selection (ceylan)


30. Ative a Flood Fill e configure: Match Mode: RGB Value / Tolerance=2 / pinte cada círculo com cores à sua escolha.

(Nota: no tutorial foram usadas as seguintes cores:
#c60337-#bfbc56-#dc4924-#000903-#f6f309)

31. effects / plugins / eye candy 5: impact / glass
preset (ceylann)


32. select none

33.effects / plugins / eye candy 5: impact / perspective shadow /preset (ceylanshow)


34. adicione nova layer

35. selections / load selection from disk / selection (ceylan.1)


36. Ative a Flood Fill com a mesma configuração anterior e use as cores que desejar para
pintar cada quadrado

(no tutorial, foram usadas as cores: #32ca32-#000000-#3ffcfc-#fcfc00)

37. effects / plugins / eye candy 5: impact / glass
preset (ceylann)


38. select none

39. layers / duplicate

40. layers / arrange / move down

41. adjust / blur / gaussian blur: 30


42. effects / plugins / toadies / ommadawn


43. ative a layer superior

44. abra o tube (decoceylan-2) / copie e cole como nova layer

45. effects / image effects / offset (24/197)


46. adicione nova layer

47. selections / load selection from disk / selection (text vera)


48. pinte com uma cor de sua escolha

49. select none

50. effects / plugins / eye candy 5: impact / perspective shadow / preset (reflect in front, sharp)


51. drop shadow: 1  1  30  1  preto

52. abra o tube (text-mendes) / copie e cole como nova layer

53. effects / image effects /  offset (-388/-14)


54. abra o tube (femme673-coly) / copie e cole como nova layer

55. image / resize: 70%


56. effects / image effects / offset (0/0)


57. drop shadow: 0 0 50 29 preto

58. image / add borders 1px / preto
image / add borders 3px / branco
image / add borders 1px / preto
image / add borders 10px / branco
image / add borders 1px / preto
image / add borders 45px / branco
image / add borders 1px / preto
image / add borders 2px / branco
image / add borders 1px / preto

59. coloque sua assinatura

60. image / resize: 950px(width

61. adjust / sharpness / unsharp mask


62. salve: file / export / jpeg optimizer


Obrigada por fazer minhas traduções