

This tutorial is from Saturnella and was translated with your permission
| Tutorial | Rajah Original HERE |
| Credits | Saturnella / MJ / Narah |
| Material | HERE |
| Plugins | Mehdi Graphic Plus Ap 01 [Innovations] Flaming Pear / Flexify2 Toadies Mura's meister Eye Candy 5: Impact AAA Frame |
| DownloadPlugins | HERE |
| Atenção! | * Double click on the Alien Skin preset to export
to the plugin * Save the texture (bow-tile) in the Textures folder of the PSP |
| Contacts |
E-mail: HERE Facebook: HERE Your Versions: HERE |
SCRIPT
(click on the prints for a better view)
01. put color 1 (light) in the foreground and color 2 (dark) in the background
02. open the alpha file (alpha-rajah) / duplicate (shift + d)
/ close the original / rename to raster 1
03. effects / plugins / mehdi / wavy lab 1.1

04. adjust / blur / gaussian blur: 40

05. add new layer
06. selections / select all
07. open the landscape tube (afri-06) / copy and paste into the selection
08. select none
09. effects / image effects / seamless tiling

10. adjust / blur / radial blur

11. effects / edge effects / enhance more
12. repeat enhance more
13. merge visible
14. effects / plugins / mehdi / sorting tiles

15. repeat the sorting tiles, changing only to (plus)

16. effects / plugins / graphic plus / horizontal mirror / default

17. effects / plugins / graphic plus / vertical mirror / default

18. selections / load selection from alpha channel / selection 1

19. add new layer
20. activate the flood fill (bucket) and set 30 to opacity

21. fill the layer with color 3
22. select none
23. layers / duplicate
24. image / mirror / mirror horizontal
25. merge down
26. effects / plugins / ap 01 [innovations] / lines-silverlining

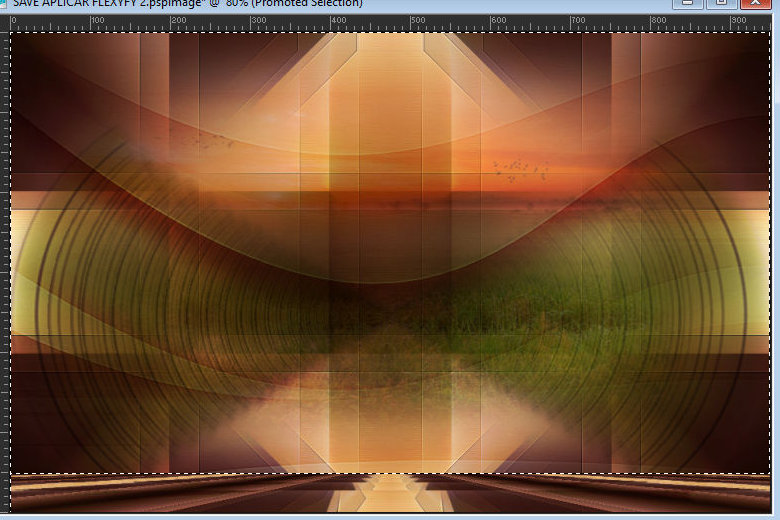
27. effects / plugins / flaming pear / flexify2

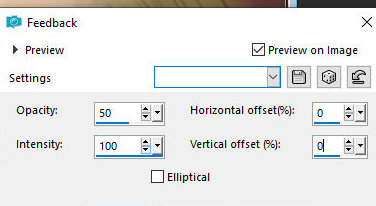
28. effects / reflection effects / feedback
29. layers / properties / blend mode: hard light

Drop shadow: 0 0 80 30 black
31. objects / align / bottom

32. activate the bottom layer - merged
33. layers / duplicate
34. effects / plugins / toadies / what are you? / default

35. effects / edge effects / enhance more
36. layers / properties / blend mode: multiply / opacity: 75

37. add new layer
38. selections / select all
39. open the landscape tube / copy and paste into the selection
40. select none
41. layers / arrange / bring to top
42. layers / properties / opacity: 70%
(Note: you can change the value, according to your tubes)

43. add new layer
44. return the flood fill opacity to 100%
45. paint with color 2
46. layers / new mask layer / from image / mask (narah-mask-0493)

47. adjust / sharpness / sharpen more
48. merge group
49. layers / properties / blend mode: overlay

50. merge visible
51. selections / load selection from alpha channel / selection 2

52. selections / promote selection to layer
53. effects / plugins / mura's meister / perspective tiling / default

54. select none
55. click on the transparent part with the magic wand to select
56. selections / modify / expand: 40

57. press delete on your keyboard 3 or 4 times
58. select none
59. activate the top layer
60. open the tiger tube / copy and paste as a new layer
61. image / mirror / mirror horizontal
62. image / resize: 80%

63. position according to model
64. effects / plugins / eye candy 5: impact / perspective shadow /preset (drop shadow, blurry)

65. open the boy's tube / copy and paste as a new layer
66. image / resize: 65%

67. position according to model
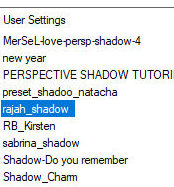
68. effects / plugins / eye candy 5: impact / perspective shadow
preset (rajah-shadow)
69. open the tube (text) / copy and paste as a new layer
70. position according to model
71. drop shadow: 1 1 100 1 black
72. layers / properties / blend mode: overlay

73. activate the bottom layer
74. add new layer
75. paint with white
76. layers / new mask layer / from image / mask (mj-mask-waves)

77. effects / edge effects / enhance
78. merge group
79. effects / plugins / ap 01 [innovations] / lines-silverlining

80. layers / properties / blend mode: soft light or other

81. drop shadow: 1 1 100 10 black
82. image / add borders / 1px / color 2
83. image / add borders / 5px / color 4
84. image / add borders / 2px / color 3
85. image / add borders / 10px / color 4
86. image / add borders / 1px / color 2
87. image / add borders / 2px / color 1
88. image / add borders / 1px / color 2
89. image / add borders / 25px / color 4
90. image / add borders / 3px / color 3
91. image / add borders / 50px / color 4
92. select this 50px edge with the magic wand

93. effects / texture effects / texture (bow-tile)
94. effects / plugins / aaa frame / foto frame

95. selections / invert
96. drop shadow: 0 0 80 40 black
97. select none
98. repeat the photo frame with Width = 5

99. place the Saturnella watermark
100. place your signature
101. merge all
102. image / resize: 900px (width)
103. adjust / sharpness / unsharp mask

104. save: file / export / jpeg optimizer
Thank you for doing my translations
Nenhum comentário:
Postar um comentário
Observação: somente um membro deste blog pode postar um comentário.