

Este tutorial é de Womanence e foi traduzido com a sua permissão
Tutorial: You + Me - Original AQUI
Créditos: Womanence Material - AQUI
Plugins:
Unlimited 2
Background Designers sf 10 IV / @BlueBerry Pie
Simple / 4 Way Average
VanDerLee / UnPlugged-X
DSB Flux / Linear Transmission
Mura's meister / perspective Tiling
Mura's meister / Pole Transform
Tutorial: You + Me / Womanence |
ROTEIRO:
(clique nos prints para visualizar melhor)
01. coloque a cor #FFFFFF no foreground e a cor #b1356b no background


02. Prepare um gradiente Linear:

03. abra uma nova imagem transparente com 1024x550px
04. pinte a imagem com o gradiente
05. effects / plugins / unlimited 2 / background designers sf10 IV / @BlueBerry Pie / default


06. layers / duplicate
07. image / resize: 82% - all layers desmarcado
08. image / mirror
09. merge visible
10. effects / image effects / seamless tiling / default


11. a imagem estará assim:


12. layers / duplicate
13. image / resize: 82% - all layers desmarcado
14. effects / plugins / VanDerLee / Unplugged_X / Defocus

15. layers / properties / blend mode: soft light


16. merge visible
17. layers / duplicate
18. effects / plugins / dsb flux / linear transmission

19. effects / plugins / dsb flux / linear transmission

20. effects / plugins / mura's meister / perspective tiling

21. effects / plugins / mura's meister / perspective tiling/clique em "reset" e configure conforme o print

22. drop shadow: -6 0 100 31 cor #b1356b / SHADOW ON NEW LAYER MARCADO


23. permaneça na layer - copy of merged shadow 1
24. effects / plugins / afs import / sqborder 2 / default


25. layers / duplicate (layer da sombra)
26. effects / plugins / mura's meister / pole transform

27. a imagem e as layers estarão assim
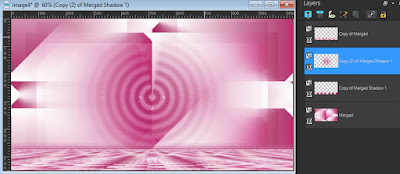

28. merge visible
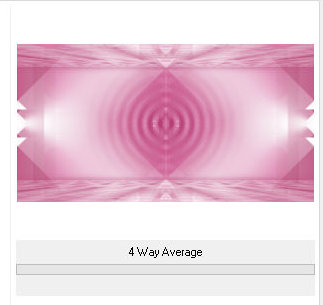
29. effects / plugins / unlimited 2 / simple / 4 way average / default

30. adjust / sharpness / sharpen more
31. ative a selection tool / custom selection e configure conforme o print

32. effects / plugins / vanderlee / unplugged-x / defocus

33. selections / promote selection to layer
34. select none
35. layers / duplicate
36. image / mirror / mirror horizontal
37. merge visible
38. a imagem estará assim:


39. copie o tube (elem-you+me-mdw) e cole como nova layer
40. effects / imagem effects / offset (-154/-10)


41. copie o tube (couple-you+me-mdw) e cole como nova layer
42. effects / image effects / offset (314/0)


43. selections / select all
44. image / add borders / 2px / #ffffff
45. selections / invert
46. Abra a textura (Texture Or) e minimize, na paleta materials, selecione a opção pattern, localize a textura
(Texture or) e configure conforme o print

47. pinte a seleção com essa pattern (dê bastante zoom na imagem para facilitar a aplicação)
48. select none
49. selections / select all
50. image / add borders / 2px / #ffffff
51. select none
52. selections / select all
53. image / add borders / 2px / #ffffff
54. selections / invert
55. Aplique a pattern (Texture Rose), conforme o item 46


56. select none
57. image / resize: 980px - all layers marcado
58. adjust / sharpness / sharpen
59. coloque sua assinatura
60. merge all
61. salve: file / export / jpeg optimizer
Obrigada por fazer minhas traduções
Nenhum comentário:
Postar um comentário
Observação: somente um membro deste blog pode postar um comentário.