

This tutorial is by Naise M and has been translated with your permission.
Thank you very much Naise for this beautiful tribute! be very happy
Tutorial:
Vera Mendes - Original
HERE
|
Credits:
Tube: Pink
Mask:
Narah
Demais
materiais: Naise
|
Material
- HERE
(Note: the Cloudy Days gradient is a PSP20 gradient, if someone doesn't have it, talk to me via my email below)
|
Plugins:
Unlimited 2 VM Instant Art Mehdi / Sorting Tiles Nik Software /Color Efex Pro 3.0 |
Plugins - HERE
|
*Save the selection to the PSP Selections folder
|
SCRIPT:
01. open a new transparent image with 1000x700px
02. selections / select all
03. copy the (ccab608b3d693ca908e4d35a4210806d) and paste in the selection
03. 1 select none
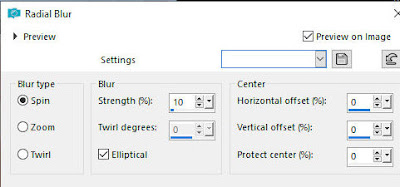
04. adjust / blur / radial blur

05. effects / texture effects / blinds
(Note: in color, put a color that matches the image)


06. effects / edge effects / enhance
07. effects / image effects / seamless tiling / default


08. effects / plugins / mehdi / sorting tiles


09. effects / texture effects / texture (Striaton)


10. add new layer
11. Click on the foreground / in the window that opens select the Gradients option / Locate the Cloudy Days gradient / configure a sunburst gradient as the print


11.1 paint the layer with this gradient
12. layers / new mask layer / from image / mask (narah-mask-1262)


13. merge group
14. drop shadow: 1 1 80 7.34 black
15. effects / user defined filter / emboss 3


16. add new layer
17. selections / load selection from disk / selection (@ -selec-veram)


18. paint the selection with the cloudy days gradient
19. effects / texture effects / blinds


20. select none
21. layers / duplicate
22. with the Move tool, move the images positioning as shown in the print


23. merge down
24. layers / properties / blend mode: hard light


25. Open the tube (deco-veramendes) / activate the copy of promoted selection 1 layer / copy and paste as a new layer
26. effects / image effects / offset (245 / -118)


27. effects / plugins / nik software / color efex pro 3.0 / contrast color range (optional)


28. copy the tube (deco2-veramendes) and paste it as a new layer (activate raster 2)
29. effects / image effects / offset (-406/0)


30. drop shadow: 1 1 80 7.34 black
31. image / add borders / 1px / black
32. image / add borders / 20px / white
33. image / add borders / 6px / # 003668
34. image / add borders / 46px / white
35. image / add borders / 10px / # 2a6bbb
36. image / add borders / 10px / white
37. image / add borders / 10px / # 02234e
38. add new layer
39. effects / plugins / unlimited2 / vm instant art / three cuts


40. layers / new mask layer / from image / click the arrow and select the first on the list (image 125). In yours there will be another numbering.
(Note: explaining better: the last layer of your work, where the effect was applied (instant art / three cuts) will work as a mask. This last layer will appear first in the image list shown above, in the print)

(Note: explaining better: the last layer of your work, where the effect was applied (instant art / three cuts) will work as a mask. This last layer will appear first in the image list shown above, in the print)

41. merge group
42. layers / properties / blend mode: multiply


43. effects / edge effects / enhance
44. colorize to your liking
45. re-apply the nik software plugin to your liking (optional)
46. copy the tube (tube_veramendes_naisem) and paste it as a new layer
47. apply drop shadow and position as you prefer
48. copy the name tube (vera-naisem) and paste it as a new layer
49. position as desired
50. layers / properties / blend mode: overlay (or another that matches the colors you're using)
50. place your signature
51. merge all
52. image / resize: width: 1000
53. save: file / export / jpeg optimizer
Thank you for doing my translations
Nenhum comentário:
Postar um comentário
Observação: somente um membro deste blog pode postar um comentário.