

Este tutorial é de Jolcsi e foi traduzido com a sua permissão
|
*Salve as seleções na pasta Selections do PSP
|
ROTEIRO:
(Clique nos prints para visualizar melhor)
01. Coloque a cor 1 no foreground e a cor 2 no background


02. Abra uma nova imagem transparente com 900x550px
03. Effects / Plugins / Mehdi / Wavy Lab 1.1
Seq. de cores: 2-1-#ebd3d3-#ebd3d3

04. Adjust / Blur / Gaussian Blur: 35


05. Effects / Image Effects / Seamless Tiling

06. Effects / Plugins / Mehdi / Sorting Tiles

07. Effects / Edge effects / Enhance
08. Effects / Image Effects / Seamless Tiling

09. Adjust / Sharpness / Sharpen
10. Selections / Load selection from disk / Selection (2391)


11. Selections / Promote selection to layer
12. Effects / Texture Effects / Weave

13. Adjust / Sharpness / Sharpen
14. Drop Shadow: 0 0 57 7 cor 4
15. Selections / Modify / Select selection borders

16. Pinte a seleção com a cor 2
17. Select None
18. Layers / duplicate
19. Effects / Plugins / Toadies / What are you?

20. Adjust / Sharpness / sharpen
21. Layers / Arrange / Move down
22. Ative a layer raster 1
23. Selections / Load selection from disk / Selection (2391a)


24. Selections / Promote selection to layer
25. Select None
26. Effects / Reflection Effects / Rotating Mirror

27. Effects / Plugins / Mura's Meister / Perspective Tiling

28. Selecione a parte transparente da layer com a Magic Wand


29. Selections / Modify / Feather: 16


30. Pressione Delete 3 vezes em seu teclado
31. Select None
32. Layers / Arrange / Bring to top
33. Ative a layer Raster 1
34. Selections / Load selection from disk / Selection (2391b)


35. Selections / promote selection to layer
36. Layers / Arrange / Bring to top
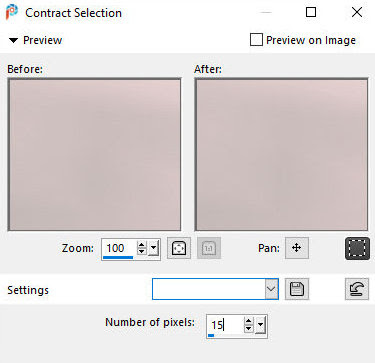
37. Selections / Modify / contract: 15

38. Copie o tube (virág) / Cole na seleção
39. Select None
40. Selections / Load selection from disk / Selection (2391b)
41. Selections / Modify / Select selection borders

42. Pinte a seleção com a cor 2
43. Selections / Invert
44. Drop Shadow igual ao anterior
45. Select None
46. Drop Sahdow igual ao anterior
47. Adjust / Sharpness / sharpen
48. Layers / Duplicate
49. Feche a layer clicando no olho
50. Ative a layer Promoted Selection 2
51. Effects / Plugins / Unlimited 2 / BKG Designer sf10 III / tremors

52. Layers / Duplicate
53. Image / Free Rotate (Right/180)


54. Layers / Properties / Opacity: 50%


55. Merge down
56. Image / Resize: 110% - all layers desmarcado
57. Ative a Pick Tool e configure: (577/106) / Pressione M


58. Adjust / Sharpness / Sharpen
59. Ative a layer Copy of Promoted Selection 2
60. Abra as layers clicando nos olhos
61. Merge down
62. Layers / Duplicate
63. Image / Resize: 36% - all layers desmarcado
64. Drop shadow igual ao anterior
65. Adjust / sharpness / Sharpen
66. Ative a Pick Tool e configure: (44/61) / pressione M


67. Layers / Duplicate
68. Ative a Pick Tool e configure: (6/230) / pressione M


69. Merge down
70. As layers deverão estar assim:


71. A imagem assim:


72. Ative a layer raster 1
73. Adicione nova layer
74. Pinte com a cor 3
75. Layers / New Mask Layer / From Image / Mask (MASK-MD-041)


76. Effects / Edge Effects / Enhance
77. Merge Group
78. Ative a layer Raster 1
79. Copie o tube (Jolcsi dekor) e cole como nova layer
80. Ative a Pick Tool e configure: (-1/54) / Pressione M


81. Layers / Properties / Blend Mode: Luminance (L)


82. Ative a layer superior
83. Copie o tube (Jolcsi546) e cole como nova layer
84. Image / Resize: 90% - all layers desmarcado
85. Posicione e aplique Drop Shadow como desejar
86. Copie o tube (jol text) / Cole como nova layer
87. Ative a Pick Tool e configure: (537/395) / Pressione M


88. Effects / Plugins / Eye Candy 5: Impact / Perspective Shadow

89. Image / Add borders / 2px / cor 3
90. Copie esta imagem / Cole como nova imagem / Reserve
91. Selections / Select All
92. Image / Add borders / 10px / cor 3
93. Selections / Invert
94. Cole na seleção a imagem copiada acima
95. Effects / Texture Effects / Weave igual ao anterior


96. Selections / Invert
97. Drop Shadow: 0 0 57 15 preto
98. Select None
99. Image / Add borders / 1px / cor 3
Image / Add borders / 2px / cor 1
Image / Add borders / 45px / cor 3
100. Copie o tube (jolc dekor2) e cole como nova layer
101. Coloque sua assinatura
102. Merge all
103. Image / Resize: Width 1000px
104. Salve: File / Export / Jpeg Optimizer
Obrigada por fazer minhas traduções
Nenhum comentário:
Postar um comentário
Observação: somente um membro deste blog pode postar um comentário.