


This tutorial is by Maria José and was translated with your permission
Original HERE
****
Credits:
SuizaBella
Luz Cristina
****
Material - HERE
If any material does not open, contact me
****
Plugins:
DSB Flux
Mehdi
Carolaine and Sensibility
Eye Candy 4000
Mura's Seamless

****
Orientations:
Click on the prints for a better view.
Remember to save work as it runs
Change Blend Mode, Opacity, and Drop Shadow to Your Images
Pick Tool replaces Deform tool from older versions of PSP
Remember to save work as it runs
Change Blend Mode, Opacity, and Drop Shadow to Your Images
Pick Tool replaces Deform tool from older versions of PSP
***
My E-Mail: HERE
Send us your versions or let me know if you have any problems
with the tutorial or material
with the tutorial or material
***
Versions: HERE
***
Groups:
********
SCRIPT:
01. Save your selections in the PSP Selections folder
02. Place the color # faf0c4 in the foreground and the color # 000000 for the background.
If using other colors, choose light colors for the foreground
03. Open a new image with 1000x700px
04. Paint the image with the color # faf0c4
05. Effects / Plugins / DSB Flux / Isotope
Note: Change the values to match your image
N.T .: For negative values, instead of typing the value, change using the arrow


06. Effects / Image Effects / Seamless tiling

07. Adjust / Blur / Gaussian Blur: 30


08. Effects / Plugins / Mehdi / Sorting Tiles

09. Effects / Plugins / Mehdi / Edges FX / Cor # 000000

10. Effects / Texture Effects / Weave

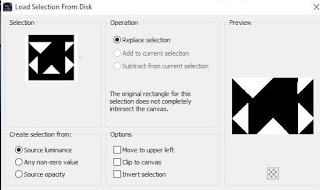
11. Selections / Load selection from disk / Selection (gypsiea-mj)

12. Selections / Promote selection to layer
13. Select None
14. Effects / Plugins / Carolaine and Sensibility /
CS_Halloween-2 - Apply 2 times

15. Adjust / Sharpness / Sharpen More
16. Drop Shadow: 0 0 60 30 black
17. Merge down
18. Effects / Image Effects / Seamless Tiling

19. Add new layer
20. Fill the layer with the light color of the foreground
21. Layers / New Mask Layer / From Image / Mask (rawpixel_3-mj)

22. Merge Group
23. Effects / Plugins / Eye Candy 4000 / Motion Trail

24. Effects / Plugins / Mura's Seamless / emboss at alpha / Default

25. Layers / Properties / Blend Mode: Overlay


26. Selections / Load selection from disk / Selection (gypsie-1-mj)


27. Add a new layer
28. Open misted / mistedgreen / copy and paste into selection
29. Select None
30. Open the tube (SuizaBella_Ref_AG-00922) / Copy and paste with the new layer
31. Image / Resize: 75% - all layers unchecked
32. Position according to model
33. Drop Shadow of your choice
34. Open the tube (deco-gypsie-mj)
35. Position according to model
36. Layers / Properties / Blend Mode: Luminance (L)


37. Open the tube (text) / Copy and paste as a new layer
37.1 Position according to the model
38. Layers / Properties / Blend Mode: Overlay


39. The layers will look like this:


40. Merge Visible
41. Image / Add borders / 1px / black
Image / Add borders / 10px / white
Image / Add borders / 1px / black
Image / Add borders / 20px / white
Image / Add borders / 1px / black
Image / Add borders / 30px / white
Image / Add borders / 1px / black
42. Selections / Load selection from disk / Selection (gypsie-2-mj)


43. Drop shadow: 0 0 60 30 black
44. Select None
45. Place your signature
46. Merge All
47. Image / Resize: Width 1000px
48. Save: File / Export / Jpeg Optimizer
Thank you for doing my translations
Nenhum comentário:
Postar um comentário
Observação: somente um membro deste blog pode postar um comentário.