

This tutorial is from Saturnella and was translated with your permission.
.......
Tutorial: Mum
Original HERE
.......
Credits:
Tine / Saturnella
.......
Material

.......
Plugins:
Mehdi
Carolaine and Sensibility
AFS import
Eye Candy 5: Impact
AAA Frame
Download: HERE
.......
Contacts:
E-mail: HERE
Facebook: HERE
Their versions: HERE
.......
Remembering:
* Change the blend mode and opacity of the layers and apply drop shadow according to your tubes.
* The Pick Tool in older versions of the PSP is called Deformation
* In old PSP versions:
Mirror / Mirror Horizontal = Mirror
Mirror / Mirror Vertical = Flip
.......
Instructions:
Double click on Alien Skin presets to export to the plugin
SCRIPT:
(click on the prints for a better view)
01. put color 1 in the foreground and color 2 in the background
02. open the alpha file (alpha-mum) / duplicate (shift + d) / close the original / rename to raster 1
03. effects / plugins / mehdi / wavy lab 1.1

04. adjust / blur / gaussian blur: 50

05. effects / plugins / carolaine and sensibility / cs-texture / default

06. layers / duplicate
07. image / free rotate left / 90

08. activate the bottom layer - raster 1
09. selections / select all
10. activate the top layer
11. image / crop to selection

12. drop shadow: 0 0 50 15 black
13. add new layer
14. paint with color 2
15. layers / new mask layer / from image / mask (lbdm-masque-204)

16. adjust / sharpness / sharpen more
17. merge group
18. drop shadow: 2 2 100 35 color 1
19. merge visible
20. selections / load selection from alpha channel / selection 1

21. selections / promote selection to layer
22. effects / plugins / AFS Import / sqborder 2 / default

23. selections / load selection from alpha channel / selection 2

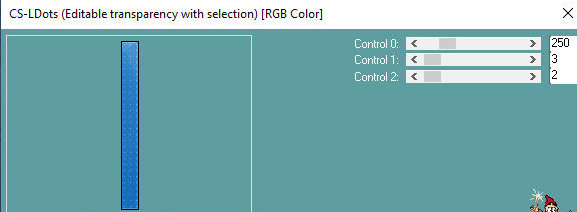
24. effects / plugins / carolaine and sensibility / cs-ldots
25. keep selection
26. effects / 3d effects / chisel

27. effects / 3d effects / inner bevel

28. select none
29. selections / load selection from alpha channel / selection 3

30. add new layer
31. Prepare a Sunburst gradient

31.1 paint the selection with this gradient
32. effects / plugins / eye candy 5: impact / glass /
preset (mum-glass)

33. select none
34. layers / duplicate
35. activate the pick tool and configure according to the print (206/199) / press M

36. layers duplicate
37. activate the pick tool and configure according to the print: (206/337)

38. layers / duplicate
39. activate the pick tool and configure according to the print (206/457)

40. close the merged layer by clicking on the eye
41. layers / merge visible

42. open the raster layer 1 by clicking on the eye
43. layers / duplicate
44. image / mirror / mirror horizontal
45. merge down
46. drop shadow: 0 0 60 35 black
47. copy the tube (deco-mum) / paste as a new layer
48. activate the pick tool and configure according to the print (737/99) / press M

49. layers / duplicate
50. image / resize: 80%

51. position according to model
52. merge down
53. layers / duplicate
54. image / mirror / mirror horizontal
55. merge down
56. drop shadow like the previous one
57. copy the tube (sat-bebe06-1) / paste as a new layer
58. image / resize: 70%

59. adjust / sharpness / sharpen
60. drop shadow like the previous one
61. copy the tube (title) / paste as a new layer
62. don't need to move
63. drop shadow: 1 1 50 1 black
64. image / add borders / 2px / color 2
image / add borders / 4px / color 1
image / add borders / 10px / color 3
image / add borders / 1px / color 2
image / add borders / 3px / color 1
image / add borders / 25px / color 3
65. select this 25px edge with the magic wand
66. effects / texture effects / tiles

67. select none
68. image / add borders / 2px / color 2
image / add borders / 4px / color 1
image / add borders / 50px / color 3
69. select this 50px edge with the magic wand
70. paint with this linear gradient

71. effects / texture effects / weave

72. effects / plugins / aaa frames / foto frame

73. selections / invert
74. drop shadow: 0 0 80 40 black
75. select none
76. repeat the Photo Frame with width = 5
77. copy the watermark (filigree) from Saturnella and paste it as a new layer
78. place your signature
79. merge all
80. image / resize: 900xp (width)
81. adjust / sharpness / unsharp mask

82. save: file / export / jpeg optimizer
Thank you for doing my translations
Nenhum comentário:
Postar um comentário
Observação: somente um membro deste blog pode postar um comentário.